Crossbars for the Crosstrek Hybrid
Now that I'm getting used to the Crosstrek, and that SUmmer is in full swing, time to put some crossbars on for the Kayak and stuff and head on out for an adventure.
When it comes to crossbars for the roof, you currently only have one choice, the Thule crossbars for the CrosstrekHybrid. I got my set from my local dealer, and you can see them at this link.
The crossbars were delivered to my dealer within 4 days, so availability seems to be pretty good.
Their quality is the same as any other Thule product, which is to say pretty darn good. They do not add wind noise when driving (unless you don't put the rubber channel filler in the bottom)
Installation was straight forward, less than 30 minutes total, with the most basic of tools. Speaking of tools, the Allen wrench provided is a pretty soft metal, I'd use a regular hardened steel one if you have it.
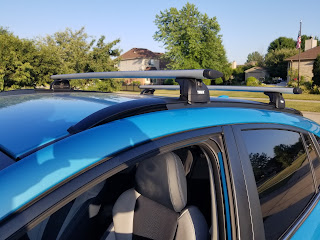 |
| Crosstrek Hybrid Crossbars for roof rack |
Below is what you will find in the box.
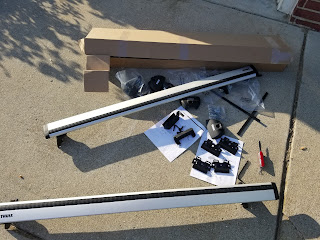 |
| Box contents |
And the clamps assembled.
 |
| Clamps for crossbar set |
Front and side views with the Crossbars on.
Mileage
Adding crossbars will reduce mileage, but so far I have no idea by how much.
Tips
There are small rubber pieces that plug the channel in the bottom. These need to be cut to size once you have the crossbars on the car. If you do not install these, the crossbars will make a loud whistling noise as you drive.
And how do they work?
The bummer I did not realize is that the Kayak carrier and clamps from my Impreza are Yakima, and those clamps do not fit a Thule bar. I need to get a new kayak carrier to go with the crossbars. So another week to wait, and another thing to spend money on.
I hope this blog helps provide some useful information to you in some way. Comment if you have any questions, or have done the crossbars yourself.
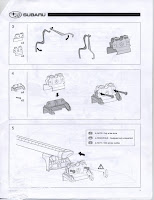
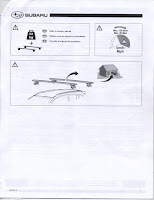
Installation Instructions
Below are the installation instructions, so you can see what you are getting into:


